سلام.
اکثر توضیحات مربوطه هم تو فروم هست:


 توجه: این یک موضوع قدیمی است که آخرین پست ارسالی آن مربوط به 2424 روز قبل است . لطفا فقط پاسخ ها ، سوالات و درخواست های 100 درصد مرتبط را به آن ارسال کنید و برای درخواست ها و سوالات جدید موضوع جدیدی را ایجاد کنید


سلام.
اکثر توضیحات مربوطه هم تو فروم هست:
این ال سی دی :LVDS چند پین را انداختند ؟
lp150x08-a2
تغییرات fex فایل:
here's the LCD part of it the other part is the same as the git repository
----------------------------------------
....
[disp_init]
disp_init_enable = 1
disp_mode = 0
screen0_output_type = 1
screen0_output_mode = 4
screen1_output_type = 1
screen1_output_mode = 4
fb0_framebuffer_num = 2
fb0_format = 10
fb0_pixel_sequence = 0
fb0_scaler_mode_enable = 0
fb1_framebuffer_num = 2
fb1_format = 10
fb1_pixel_sequence = 0
fb1_scaler_mode_enable = 0
lcd0_bright = 197
lcd1_bright = 197
lcd0_screen_bright = 50
lcd0_screen_contrast = 50
lcd0_screen_saturation = 57
lcd0_screen_hue = 50
lcd1_screen_bright = 50
lcd1_screen_contrast = 50
lcd1_screen_saturation = 57
lcd1_screen_hue = 50
[lcd0_para]
lcd_used = 1
lcd_x = 1024
lcd_y = 768
lcd_dclk_freq = 65
lcd_pwm_not_used = 0
lcd_pwm_ch = 0
lcd_pwm_freq = 10000
lcd_pwm_pol = 0
lcd_if = 3
lcd_hbp = 320
lcd_ht = 1348
lcd_vbp = 38
lcd_vt = 1616
lcd_hv_if = 0
lcd_hv_smode = 0
lcd_hv_s888_if = 0
lcd_hv_syuv_if = 0
lcd_hv_vspw = 0
lcd_hv_hspw = 0
lcd_lvds_ch = 0
lcd_lvds_mode = 0
lcd_lvds_bitwidth = 1
lcd_lvds_io_cross = 0
lcd_cpu_if = 0
lcd_frm = 1
.....
----------------------------------------
این هم کل مراحل کار :
-----------------------------------
let's get started!:
editing the fex.
(usefull link: fex guide)
(usefull pdf: crane_fex_guide v4.0)
- first you need to download the original fex that you're going to edit. These original fex are in the git repository of the linux-sunxi repo ( linux-sunxi ) beneath the sunxi_boards/sys_config/a10/. Here you have multiple fex files for different boards. For this case i need the cubieboard.fex since i have the 1g version of the cubieboard.
# wget https://raw.github.com/linux-sunxi/sunxi-boards/master/sys_config/a10/cubieboard.fex
once you get the file and opened it you need to edit some entries on this two sections: [disp_init] and [lcd0_para], but what to edit? You need to know your lcd pannel now. In my case i have the lp150x08 lcd pannel, its datasheet is here (for reference): lp150x08-tlc1 datasheet
as you can see this pannel has a resolution of 1024x768@60hz, lvds interface, 18bits, etc, etc.
In the [disp_init] of the fex the only line that you're going to edit is "screen0_output_type" from 3(hdmi) to 1(lcd):
screen0_output_type =1
and in the [lcd0_para] the ones acording to your lcd. In my case the parameters i have to set are on the page 26 of the lcd datasheet listed above. Heres the resulting values (only the changed lines):
lcd_x =1024
lcd_y =768
lcd_dclk_freq =65
lcd_if =3;(3= lvds)
lcd_hbp =320
lcd_ht =1348
lcd_vbp =38
lcd_vt =1616
lcd_lvds_bitwidth =1;(1=18 bits)
lcd_frm =1;(dither 1= rgb666)
lcd_ht and lcd_vt are just calculations. I get this formulas in the errors i got in my previous tests:
lcd_ht >=(lcd_hbp+lcd_x*1+4)
(lcd_vt/2)>=(lcd_vbp+lcd_y+2)
so, after we have changed the fex fitting our needs we need to create the script.bin from it. For this we need to get the sunxi-tools and compile them:
$ git clone git://github.com/linux-sunxi/sunxi-tools.git
$ cd sunxi-tools/
$ make
copy the modified .fex (cubieboard.fex in this example) to sunxi-tools/ and run:
$ ./fex2bin cubieboard.fex script.bin
now you have to copy the "script.bin" file to your fat partition of the sd card and you're ready to go!.
Note: The version of the u-boot that i have work with the default enviromental variables so in my sd fat partition i only have the script.bin and the uimage.
testing the lcd
after you put your sd card on the cubieboard and started linux follow teh instructions on the "boot the kernel" part of this page:
compile_x11_driver_for_a10
in my case i just needed to put "modprobe lcd" to see the boot msgs in my lcd (on the picture of my first post here)
compiling the kernel
(link used: first steps)
if you don't have any uimage or when you run modprobe you get errors or module not found, etc, etc you probably need to compile the kernel and the modules
to do this you need:
- build essentials
$ sudo apt-get install build-essential
- the arm toolchain
$ sudo apt-get install gcc-arm-linux-gnueabihf
- to make the uimage you'll need:
$ sudo apt-get install u-boot-tools
(or sudo apt-get install uboot-mkimage.. I don't remmember if you compile and do not get an uimage file isntall this)
- others that i think i've used... But not sure
$ sudo apt-get install libusb-1.0-0-dev
if i'm missing something it's because i don't remember or it was installed on my linux before, but don't worry, the two tools you'll need are:
- sudo apt-cache search word-to-search-or-lib-etc
- google.
now you need to run this in the folder of your choice (i was on the desktop, don't worry, it will create a separate folder so you don't worry for the mess)
$ git clone git://github.com/linux-sunxi/linux-sunxi.git
$ cd linux-sunxi
$ git checkout sunxi-3.0
$ make arch=arm cross_compile=arm-linux-gnueabihf- sun4i_defconfig
$ make arch=arm cross_compile=arm-linux-gnueabihf--j5 uimage modules
and now just to put everything in one folder:
$ mkdir output
$ cp arch/arm/boot/uimage output/
$ make arch=arm cross_compile=arm-linux-gnueabihf- install_mod_path=output/ modules_install
done! Now you have your kernel and modules.
Put the "uimage" in the fat partition next to the script.bin and the "lib" folder on your rootfs. If you see the /lib/modules/ was empty and now you have a 3.0.57+/ on it.
If you don't have a rootfs on your ext partition i would recommend the linaro alip form this page as this is the one i've used.
linaro releases
take the last one... The "heaviest" one. Untar it and put the contents of the folder "binary/boot/filesystem.dir/" inside your ext partition (you need to be root for this) and don't forget to add the "lib" folder on it (the one that is in the "output" folder when we compiled the kernel)
----------------------------
ویرایش توسط dariush_ab : 09-02-2013 در ساعت 11:09
البته عکسهایی که مهندس زارعی گذاشتن مربوط به " NEC SVAXG10TB panel " هستش که یک نفر دیگه جواب گرفته.

وای وای خیلی عالی شد . من که پولم نرسید این برد رو همون اولش بخرمولی انشا الله خدا برسونه خواهم خرید زندگی دانشجوییه دیگه
. فکر کنم حالا با توجه به کارهایی که انجام شده خیلی راحت تر بشه vga رو هم راه انداخت .
در ضمن این برد توی فروشگاه موجود هست ؟
LED-Blinking و stepper motor رو هم با این برد راه انداختن!

باشه حتما.
دوستانی که اندورید روی این بورد دارند، اگه میتونن برنامه Antutu benchmark رو روی بوردشون نصب کنن تا یه مقایسه ای از نظر پردازشی بین بردها داشته باشیم.
من که دانلود کردم یک فایل zip هستش نه apk.
یکی دیگه هم که خطا میداد.
اگر apk رو دارید اینجا بذارید تا نصبش کنم.
با سلام
بعد از حدود یک هفته سرانجام امشب تونستم از طریق خط فرمان لینوکس LEDهای روی برد را خاموش روشن کنم.
اول فکر می کردم کار خیلی سختیه ولی فهمیدم فقط لازم بود یکسری اطلاعت اولیه درباره لینوکس و کرنل داشته باشیم بقیه اون اماده برای استفاده است.
از سیر تا پیاز لینوکس برای کیوبی توی این لینک هست فقط باید روش استفاده اش را بدونیم.
linux-sunxi (Linux on Allwinner SoCs (A10/A13/F20)) · GitHub
برای روشن کردن LED باید این مراحل انجام بدیم. (بصورت خلاصه)
1- نصب linaro روی SD
2- کامپایل کرنل و فعال کردن درایور LED.
3- تنظیم فایل script.bin
4- اجرای دستورات مربوط به روشن و خاموش کردن LED داخل ترمینال.
مرحله 1 را قبلا نوشته بودم.
دوستان اگه اون مرحله را انجام دادید و مشکلی نداشتید
و البته اگه موافق باشید مراحل بعدی را هم توضیح بدم.
انشالله بتونیم سایر قسمت های برد را هم راه بندازیم.


شدیدا مشتاقم مورد دوم و سوم توضیح بدین
خوشحالیم که ایران میکرو تو وارد کردن این برد پیش قدم شد

قول نمایندگی دادننوشته اصلی توسط sigma-mx

ولی خوشم میاد اسم ما جلوتر از آلمان هاست
Buy
سلام.1- نصب linaro روی SD
2- کامپایل کرنل و فعال کردن درایور LED.
3- تنظیم فایل script.bin
4- اجرای دستورات مربوط به روشن و خاموش کردن LED داخل ترمینال.
جناب چنگانی عزیز تبریک میگم.
از آنجایی که بعضی ها مثل من زیاد با لینوکس آشنا نیستن میشه یک کمی ساده تر توضیح بدید؟
این linaro رو از هر طریق که نصب کنیم فرق نمیکنه دیگه؟درسته؟
شما یک سری مراحل برای نصب در لینوکس فرمودید و در جایی دیگر هم یک ایمج گذاشتین که مستقیم داخل اس دی ریخته میشد.از طرفی میشه اونو با berryboot هم نصب کرد.شما کدوم رو کار کردید؟
2- بعد از نصب linaro مگر کرنل کجاست که باید کامپایل بشه .مگه با خود linaro نیست؟
خیلی ممنون.
سلام مجدد.
شما تصویر لینوکس رو بالاخره با چی تونستید ببینید؟

کنترل سخت افزار رله ها با آندرواید Android امکانش هست چون هسته لینوکس و اندرواید یکیه ها؟
بله درسته، با آندروید هم میشه فقط باید درایورهای لازمش را کامپایل کنیم.
سورس کامل Android TV اینجا هست.
http://dl.cubieboard.org/software/so..._opentv.tar.gz
من خودم روش کار نکردم.
با سلام
برای نصب لینوکس راه های مختلفی وجود دارده:
1- با استفاده از BerryBoot.
خوبیش اینه که خیلی راحته ولی نیاز به HDMI داره و باید توسط خود کیوبی ایمیج اون دانلود بشه که با سرعت کم مشکله
2- استفاده از ایمیج آماده و ریختن روی SD
این روش هم سخت نیست ولی نیاز به دانلود حدود 2 گیگ داره. برای اطلاعات بیشتر #298 را مطالعه کنید
3- نصب دستی لینوکس
نیاز به دانلود کمتر داره ولی کمی سخت تره ولی می تونیم نسخه های جدیدتری نصب کنیم. برای اطلاعات بیشتر #268
را مطالعه کنید.
برای اینکه کمی از مشکلات برطرف بشه من خودم از لینوکسی که ساختم ایمیج گرفتم و حدود 800 مگابایته. انشالله تا چند روز دیگه آپلودش می کنم. حداقل از دانلود 2 گیگ راحته.
من پیشنهاد می کنم که از روش 3 استفاده کنید، چون که هم می تونیم نسخه های جدیدتر بسازیم و هم در ضمن برای ساخت کرنل سفارشی مراحل مشابهی را باید انجام بدیم.
با سلام
قبل از این که به شرح ساخت کرنل بپردازم بنظرم بهتره توضیحاتی درباره بوت تراشه A10 بگم.
همین طور که توی این لینک توضیح داده
BROM - linux-sunxi
وقتی برد را روشن می کنیم اول از همه برنامه داخل حافظه BROM خود تراشه اجرا میشه و بعد از اون به یک ترتیب خاصی بوت از وسایل جانبی شروع میشه:
1. SD Card0
2. NAND Flash
3. SD Card2
4. SPI NOR Flash
5. FEL/USB Boot
به خاطر همین ترتیب است که اگر SD با قابلیت بوت داشته باشیم دیگه برد برنامه داخل حافظه NAND را بوت نمیکنه.
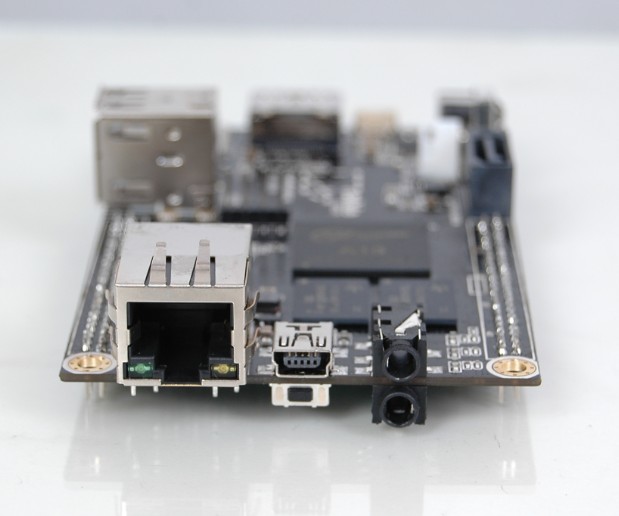
مطابق تصویر روی برد یک USB OTG و یک کلید FEL وجود داره. با گرفتن این دکمه در هنگام روشن شدن، برد از روی USB بوت میشه و می توانیم اطلاعات داخل حافظه NAND را با برنامه Livesuit عوض کنیم. برای اطلاعات بیشتر لینک زیر را مطالعه کنید.
FEL/USBBoot - linux-sunxi
علاوه بر این USB OTG برای اندروید و مواردی مثل ADB و fastboot هم استفاده میشه. برای اطلاعات بیشتر لینک زیر را مطالعه کنید.
Android software development - Wikipedia, the free encyclopedia
سلام اقای چگانی پیشرفت بسیار خوبی داشتین یه کارت هدیه 50 تومنی خرید از فروشگاه میتونید دریافت کنید لطفا پیام خصوصی بدین
سلام
مرسی مهندس کارت عالی هست.
پیشنهادم این است یک گروه سخت افرازی و نرم افرازی برای این برد تشکیل بدهیم تا کار هایمان را تقسیم بندی کتیم و از کارهای موازی جلوگیری کنیم.
حتی می توانیم جلسات حضوری هم داشته باشیم و تبادل نظر کنیم.
 مجوز های ارسال و ویرایش


 پاسخ با نقل قول